Aluminum Gutters: The Ultimate Guide for Protecting Your Home
Rain keeps gardens green, but it can cause big trouble when water slides off the roof without control. Rotting fascia boards, stained siding, and puddles by the foundation often start with tired, leaky, or badly sized gutters. Many people battle constant clogs, rust spots, and noisy drips yet feel unsure which upgrade will fix the mess for good.
This guide explains why
aluminum gutters solve those headaches and demonstrates how they protect every edge of the roof. You’ll learn key benefits, smart add-ons, and easy upkeep steps. We’ll also tackle problems like
overflowing gutters and stubborn leaves that block water flow. Read on, and you’ll know when a simple DIY rinse is effective and when to book a professional for full service.
Why Choose Aluminum for Your Gutters?
Aluminum beats steel, vinyl, and copper in three critical ways: weight, cost, and corrosion resistance. This metal is lightweight, so long runs hang securely without the need for extra brackets. It shapes on-site into seamless lengths, trimming waste and leaks. Material prices stay friendly, yet the baked-on finish fights rust for decades.
Unlike vinyl that cracks in deep cold, aluminum flexes through seasons without splitting. That flexibility also lets it match any roof pitch, color, or architectural style. When you call for a
gutter installation, technicians can roll-form 5-inch or 6-inch K-style troughs right at the curb, then curve downspouts to fit tight corners.
Energy-saving coatings even reflect heat, which protects paint on nearby fascia and reduces ice buildup. With routine checks twice a year,
aluminum gutters can last 25 years or more, providing solid value to anyone seeking lasting peace of mind. For more detailed comparisons, see this resource.
How Aluminum Gutters Shield Your Roof and Walls
Direct Water Where It Belongs
Fast, controlled drainage keeps roof edges dry. That prevents mold inside soffits and stops nails from rusting out of shingles. When the flow stays steady, siding and brick avoid splash stains, and basement walls stay free of seepage cracks.
Guard, Fascia, and Soffit
Moisture that creeps behind the trough can warp wood trim. Pair gutters with strong soffit and fascia boards to close every gap. Together, they form a weather-tight belt around the home.
Protect Landscaping
Water that leaps over the lip erodes mulch and compacts soil around delicate roots. Correct downspout placement channels runoff into safe zones or a rain barrel. Your plants thrive, and the lawn stays even.
Stop Overflow Before It Starts
Spot the Early Signs
Look for peeling paint, water streaks, or muddy marks under the eaves. These hints often indicate that gutters are overflowing during heavy storms. Another clue is standing water inside the channel long after the rain ends.
Clear Out Blockers
Leaves, seedpods, and shingle grit pile up faster than many think. When there’s debris in gutters, water has nowhere to go, so it spills over the front edge and soaks the wooden trim. A sturdy ladder, scoop, and hose clear most blockages in minutes.
Upgrade Capacity
Older homes often rely on four-inch troughs, yet today’s downpours dump more water in a shorter amount of time. Upsizing to a six-inch profile or adding an extra downspout can solve many cases of overflowing gutters without incurring significant expense. Check our guide on proper gutter size for detailed information.
Install Leaf Guards
Screens or micro-mesh covers lock out leaves while letting rain glide through. These systems reduce ladder time and prevent debris in gutters from accumulating into layers that attract pests.
Maintenance Tips for Long-Lasting Performance
Twice-Yearly Cleaning Routine
- Pick a dry, mild day in late spring and late fall.
- Wear gloves and eye protection.
- Remove big clumps by hand.
- Flush remaining silt with a garden hose toward each downspout.
- Rinse the downspout until water flows clear.
Seal and Secure
Caulk any pinhole leaks with polyurethane sealant. Tighten loose gutter spikes or replace them with hidden hangers that provide a better grip.
Check for Sagging
View the runs from the side. A flat or backwards slope causes gutters on houses to pond water. Adjust hangers so each section drops 1⁄4 inch every ten feet toward the outlet.
Inspect Adjacent Parts
Look at shingles, drip edge, and the rain gutter downspout elbow. A kinked elbow pushes water back up, leading to overflowing gutters and rot.
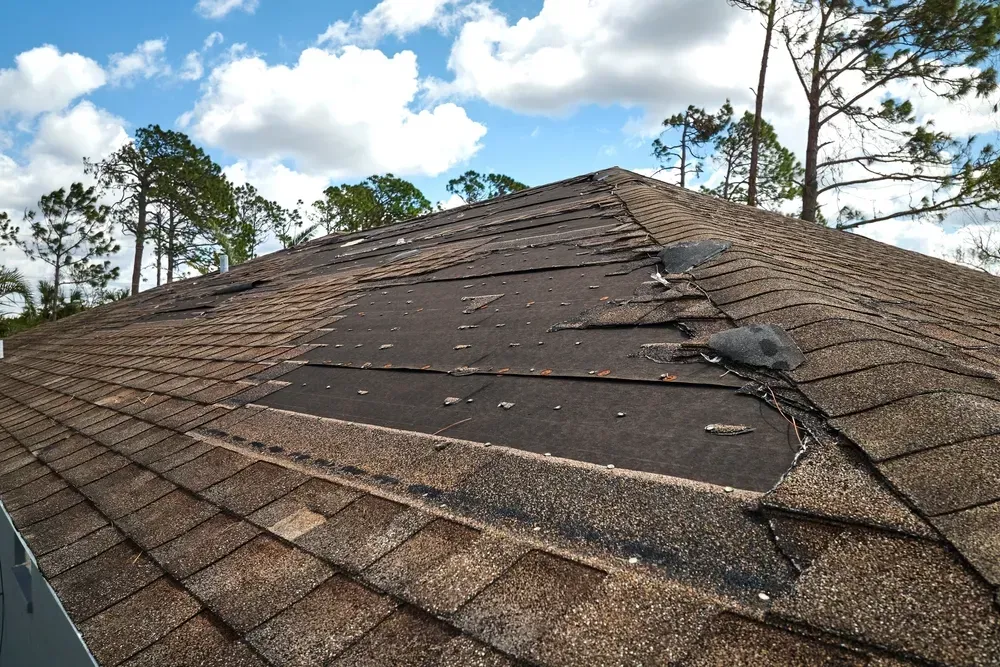
When to Call the Pros
Some fixes sit beyond a Saturday chore. If you spot cracks longer than six inches, paint bubbling across several feet, or sections pulling away from the fascia, replacement is often the better option than repair. A licensed crew can set up seamless troughs, larger outlets, and sturdy brackets in a single day.
Pros use high-flow corners, stainless screws, and color-matched sealants that retail stores don’t stock. They’ll also advise on a zinc or
steel gutter combo if wind or tree impact threatens softer aluminum edges.
For new construction, integrate the drip edge, ice shield, and the gutter system at once. That coordination stops
gutters overflowing in the first season and keeps gutter debris to a thin film that rinses itself during light showers.
Protect Your Property with Confidence
AMP Restoration and Roofing designs, installs, and services premium water-control systems across the region. Our team combines craft and technology to create seamless on-site runs, match every color palette, and cut each piece with laser accuracy. We secure each hanger into rafter tails, seal joints with commercial-grade caulk, and back our work with strong labor and material warranties.
Whether you need a quick tune-up, full replacement, or a custom downspout layout, we listen first and deliver solutions that fit your budget, timeline, and style. From tailored
gutter installation to emergency roof repair, we aim to protect every square foot of your property from the roofline down. Reach out, and experience our clear quotes, tidy work sites, and prompt follow-up.
You might also like